Jewelry Photogrpahy-Part Two: Lighting
By Signe
In this second segment of our Series on Jewelry Photography, we will focus on the most critical part of the process, lighting your creations. Achieving success in photographing jewelry is reliant on having good, natural lighting.
It is always best to use indirect natural light when photographing your creations. Artificial light can dull the reflective surfaces and give a yellow cast to the photo. And direct light, even if natural, is far too is harsh for jewelry with its metallic and faceted surfaces. It can create “hot spots” (areas that look bright white) and deep sharp shadows. There are many options for lighting and each has pros and cons. Choose what is right for your budget and experiment with it to get the best results. Take LOTS of photos. This is definitely a process where you have to “break a few eggs to make an omelet.”
Sunlight Outdoors
Shooting outside on overcast days is great but when it is full sun you need to create diffused, indirect light. Possible ways to achieve this are to place your photo surface under a tree or other large item that is creating shade, working under a large umbrella (white or cream colored would be best) or suspending a piece of white fabric such as a sheet over the area that you are working. If you do trade shows or art fairs, you may own a pop up tent. The light shining through the top of a white tent canopy creates a giant light box! Set up your photo surface under it and you’re ready to go. You can also build your own light box that you can use indoors or outdoors which we’ll go into later.
Pros: Working outside offers natural light that is surrounding the piece creating a soft even tone when diffused, instead of the light coming from one direction or source.
Cons: Weather and time of day dependent, can be too harsh if not filtered properly, can be too uncomfortable (hot, cold, buggy, windy, etc.)
Sunlight Indoors
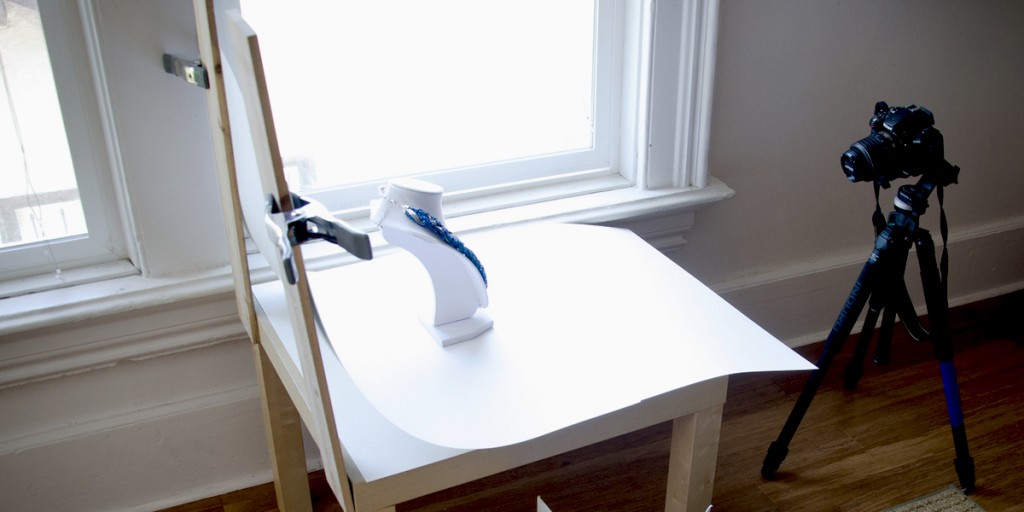
To harness natural sunlight as your light source while inside your home, try photographing your work right next to a window. To diffuse the direct sunlight, tape a large piece of tracing paper or white vellum over the window. It also helps to lay a large piece of opaque white paper on the table you are working on to reflect the light back up (you can also use this to set your white balance on your photo but more about that later!) You may need to use a “Fill Card” to bounce the light back on your piece to create sparkle on gemstones or reduce shadows. The fill card can be a piece of bright white cardstock or one that has a silver metallic surface such as Cresent Matboard 1020 Thin Silver Foil, available at many art supply stores. Be sure to turn off the artificial light sources in the room.
Pros: Inexpensive, homemade solution.
Cons: Weather and time of day dependent, can be too harsh if not filtered properly, light coming from only one the side. Only works if you have a window that gets enough sunlight!
Soft Box or Tight Tent
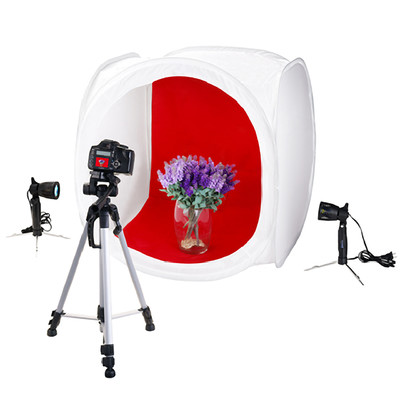
This cube shaped, white nylon light tent is widely used to produce e-commerce web images, professional catalog images and online auctions. A typical light tent or “soft box” has a front velcro door flap which has a slit in the center made for your cameras lens to shoot through in order to produce even lighting. Can be used indoors with external spot lights with daylight bulbs or outside to diffuse sunlight.
Pros: Easy to set up and transport, light weight, excellent for table top use, affordable.
Cons: Lights not included. Enclosed space can be hard to maneuver inside to adjust products.
Professional Light Box
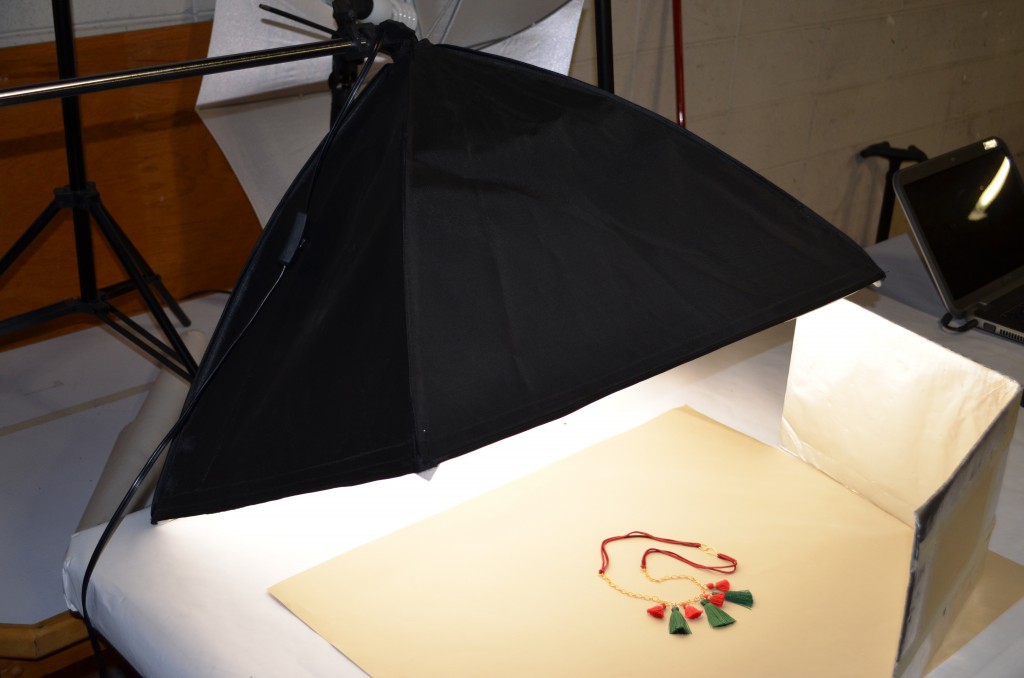
If you take lots of photos for your jewelry business you may want to invest in professional level lighting equipment. There are a wide range of options. At Nina Designs, we use a Flashpoint Light Box to photograph our products. It is very easy to assemble and the unit comes with a 70 watt flicker-free fluorescent, spiral bulb, and is rated at 5500 degrees Kelvin meaning it is “daylight balanced.” This long lasting “cool” light emits very little heat and can stay on all day long without a problem. We always use “fill cards” or “reflectors” to help bounce the light back onto the pieces.
Pros: Use any time of day, portable, allows you to create different effects by controlling shadows and highlights, height adjustable, built in light.
Cons: Can be expensive.
You need three parts to make up the light box that we have at Nina Designs. Below are the links to the equipment at www.adorama.com:
1. – Flashpoint Softbox
2. – Extension Grip Arm
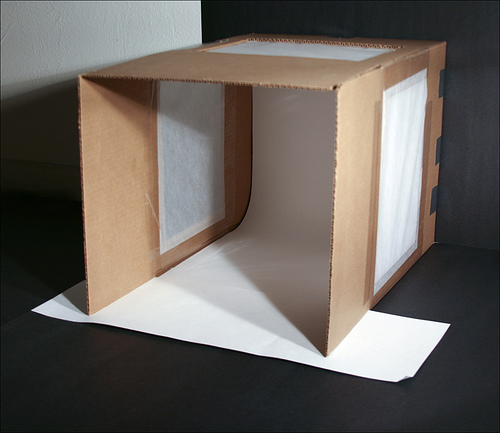
Homemade Light Box
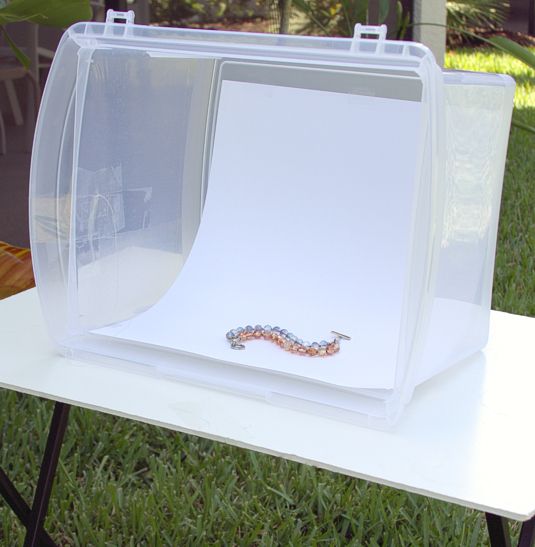
Feeling ambitious? There are many ways you can create your own light box. Most can be built for under $20.00! Basically, you need to create a frame that has openings for filtered light to come through on the sides and top. You can use a cardboard box, a clear plastic storage tub, wood, PVC pipe…the possibilities all endless. After you build your frame you’ll need some “diffusion material” to secure over the openings such as white tissue paper, interfacing fabric, thin white poly/nylon fabric, cut up men’s white undershirt material…again, those possibilities abound! Next, secure a long piece of white poster paper from the top of the back wall as the backdrop, being sure to let it curve at the bottom as it flows out towards the opening for a nice soft backdrop. Always use “daylight/sunlight” bulbs in your light fixtures to create soft natural light.
Pros: Use any time of day, portable, allows you to create different effects by controlling shadows and highlights, inexpensive, can use indoors and outdoors.
Cons: Can’t think of any!
Here’s a link to video instructions for building your own light box. Come on, get CRAFTY!
I hope you found these lighting tips helpful. For more information, here are the 3 videos I have personally watched and found beneficial. They are available for purchase through Interweave, and feature professional jewelry photographer Jim Lawson.
How to Photograph Your Jewelry
How to Photograph Your Jewelry – Beyond the Basics
Shoot Share and Sell – How to get the Best Jewelry Photos from your Cell Phone
Achieving great jewelry photos takes patience and practice but it is also a lot of FUN!